
Materials: Approximately 2 1/2 yards of 5/8” grosgrain ribbon, 2 1/4" French pinch barrette, needle, thread that matches the ribbon, glue gun, Fray Check.
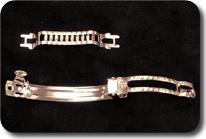 | Step 1:
Remove the metal piece from the inside of the barrette and set it aside. Seal the end of your ribbon with Fray Check or by carefully using a lighter. It is difficult to estimate exactly how much ribbon will be used, so we recommend that you don’t cut the ribbon off your spool yet. You’ll seal the other end of the ribbon once you’ve cut it off the spool after completing the bow. |
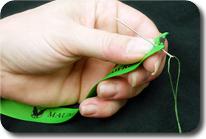 | Step 2:
Prepare your needle and thread. Cut four strands of thread, each 48 inches long. Gather the strands together and tie a knot at the end holding them all together. Thread your needle with all four strands then thread the needle through the ribbon about a quarter of an inch from the end. Pull the thread through until the knot catches on the other side of the ribbon. |
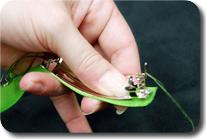 | Step 3:
Place the ribbon flat along the back of the barrette as shown. If you are using custom printed ribbon, place the side without print along the back of the barrette so that the printed side will be facing up. Thread a stitch downward through the hole at the end of the barrette, going through the ribbon. |
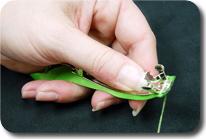 | Step 4:
Stitch around the barrette and ribbon on the right side of the hole then pull tightly. Now stitch around the barrette and ribbon on the left side of the hole. The ribbon should now be securely attached to the end of the barrette with thread wrapped around both the right and left sides of the ribbon and barrette. |
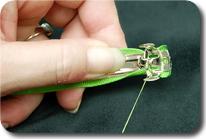 | Step 5:
From this point forward, you will need to use only the thread and not the needle. At the area just inside the barrette, next to the spring, wrap the thread around the barrette and ribbon twice. |
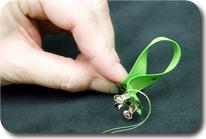 | Step 6:
Turn the barrette so that the flat side is on top. Take up a loop approximately of 1 1/2”. If you would like a taller bow, take up a bigger loop. |
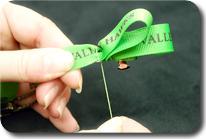 | Step 7:
Wrap the thread around the barrette two to three times, close to the base of the loop. Pull slightly each time you wrap around. Be sure to squeeze the ribbon tightly to the barrette so the ribbon doesn’t fold over. |
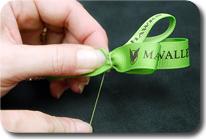 | Step 8:
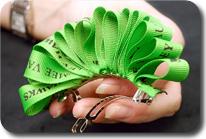
Form another loop, this time angling upward or downward as you wish. Wrap the thread around the barrette at the base of the loop just as before. Once you have secured the shape of your loop, create a small amount of space between the two loops, then wrap the thread around the barrette two more times and pull very tightly. Now slide both loops toward the end of the barrette to make room for more loops. |
 | Step 9:
Continue to form loops until the barrette is full. At this point, use scissors to clip the ribbon from the spool and seal the end with a lighter or fray check. |
 | Step 10:
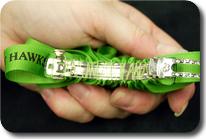
Turn the bow over so that the underside of the barrette is showing. With the remaining thread, sew along the barrette, going around the threads at an angle to secure your stitches. When you reach the other end, stitch around the threads two to three times and tie a tight knot. |
 | Step 11:
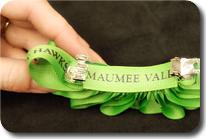
This final step is not entirely necessary, but it is meant to create a clean finish to the bow. Cut a piece of ribbon just long enough to fit along the inside of the barrette. Seal the ends of the ribbon then glue it onto the inside of the barrette so that it covers up all of the stitches. |
 | Step 12:
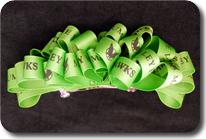
Place the removable metal piece back inside the barrette. The barrette hair bow is now complete. Fluff and shape the loops as desired. |


